

 |
Goalie MasksMask Construction Mask ConstructionAll of my masks are hand crafted one at a time by myself so the workmanship is second to none. Being an ultimate perfectionist with strict attention to detail, the mask will not leave my studio until Im happy with it. Period. If I am not happy with the results then how can I expect my clients to be ? Thats one reason why the goalies of the National Hockey League trusted the Cubberly name for 12 seasons.Each mask is custom made including the back plate therefore a full head cast is required. The mask shell is composed of multiple layers of light weight Grade 1 ballistic Kevlar, carbon fiber and impact resistant fiberglass throughout the Entire mask. These are the same fabrics developed for use in the Aerospace industry. Some mask makers reinforce selected areas of the mask with Kevlar. This is not the case with a Cubberly mask since full Kevlar sheets are used enhancing protection throughout the Entire shell. Kevlar, pound for pound, has 5 times the strength of steel. It therefore requires specialized tooling to cut through it and hours of meticulous finishing to eliminate the elevated edges and yellow fuzz that Kevlar leaves. Grade 1 Kevlar or Kevlar firsts indicate that the material is flawless and free from defects unlike Kevlar seconds that other mask makers may use. The specialized resins that impregnate the shell are formulated for high impact strength and resistance. Custom Fit BackplateThe Cubberly backplate is unique. It contours to the rounded portion of the head completely encapsulating the skull in a one of a kind custom mask. It is shorter than most plates stopping at the top of the neck. This eliminates the problem often seen when the goalie looks upwards and the backplate jabs him in the neck.Personalized SignatureEach mask comes personally signed by Ed Cubberly with the date of manufacture then protected with a glossy urethane finish.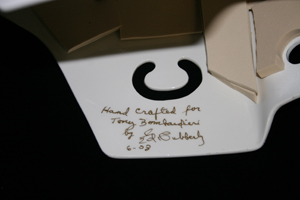
The Head CastHow to make a full head castSince each mask is custom made for the individual goalie NO TWO MASKS ARE ALIKE so a full head cast is required to ensure a proper fit. The entire casting process should take about 30 minutes.Materials:
DISCLAIMER:Ed Cubberly is not responsible for any and all injuries and or death sustained during the head casting process.
Cut or tear two rolls of plaster bandage into strips about 6 8 long
|
| Have the goalie grab the open end of the stocking with the thumb and index finger of both hands then hold it up to the bridge of the nose. Next your friend will grab the remaining open end of the stocking and stretch it over the head and ears. | 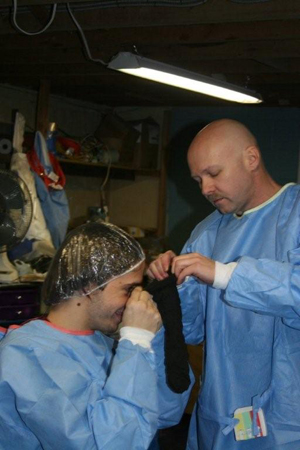 |
| The goalie then places a finger on the stocking in front of each ear while the friend tapes the stocking to the skin. | 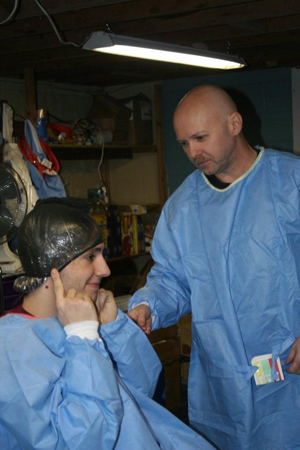 |
| The friend then grabs the foot end of the stocking and stretches it back then tapes it to the back of the head avoiding wrinkles in the tape. This will become important when later casting the back of the head. | 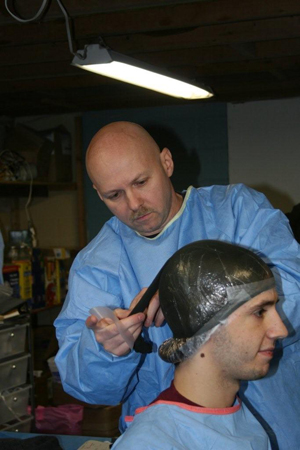 |
You should now have a nice smooth surface on the head with no air pockets or lumps from the hair. This is very important so a proper cast of the skull can be achieved.
The goalie should now close his/her eyes and leave them closed until after the procedure.
| Next, a smooth, fairly heavy , EVEN coating of Vaseline is applied with a sponge to the entire head, face, back of the head, ALL facial hair including eye brows, eyelashes, mustache, side burns. | 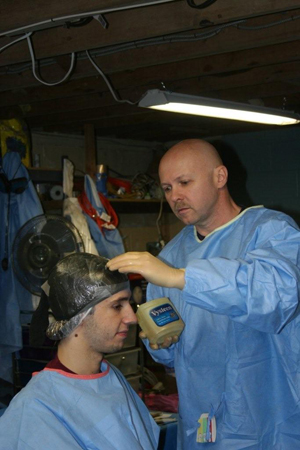 |
| Next, cover the eyebrows and eyelashes with a separate piece of Saran wrap for each eye. Gently smooth saran wrap over each eye, pushing it into the corners and avoiding wrinkles as much as possible. | 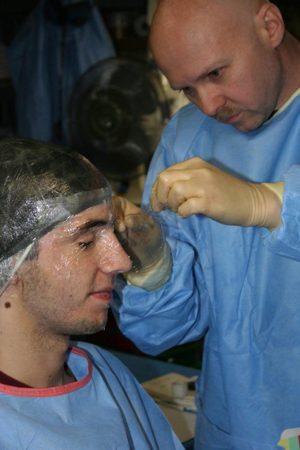 |
Apply additional Vaseline smoothly over the saran wrap.
Using LUKE WARM water partially fill the basin. Test water temperature before proceeding so the goalie doesnt get burned.
Fold the strip of plaster bandage lengthwise forming a 3 wide strip. Immerse the strip in the water, remove it, then squeeze out the excess water.
| Next, run your thumb and index finger down the strip to smooth out any wrinkles. | 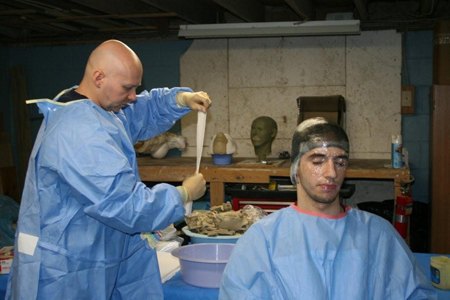 |
| Start by applying the first strip in a vertical line over the ear and extending towards the top of the head. The plaster should not extend behind the ear or youll have trouble pulling the mold off. | 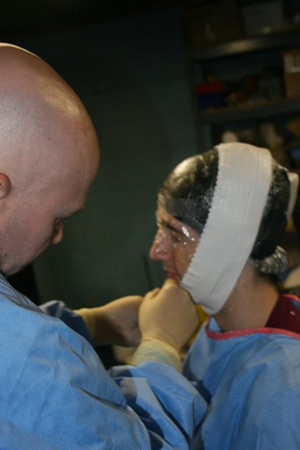 |
Continue the same step over the opposite ear joining the plaster at the top of the head.
Be sure to pull each strip taut when applying it to the head so the plaster sits snug against the head. IMPORTANT
Next overlap the lower end of the plaster at the ear and wrap a piece under the angle of the jaw joining the plaster on the opposite side under the ear.
Now the border of the mold has been formed.
| Proceed dipping each plaster strip as before and overlap each row of plaster by ½. Work from top to bottom and across the head from side to side. |  |
Be sure to smooth out the plaster while on the head by rubbing the fingers.
Since the goalie cannot see and hearing will be impaired by the stocking and cap, it is vital to talk through each step as you go and keep him informed of the progress especially as you cover the eyes and mouth.
| As you progress to the nose apply the plaster horizontally stopping at the tip of the nose. DO NOT COVER THE NOSTRILS. | 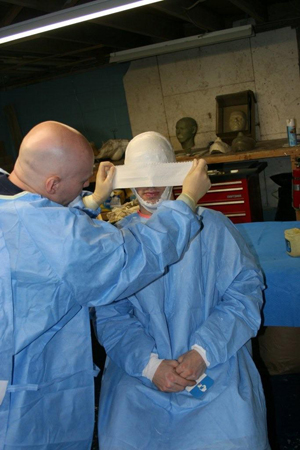 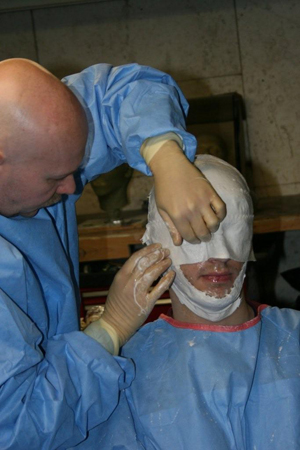 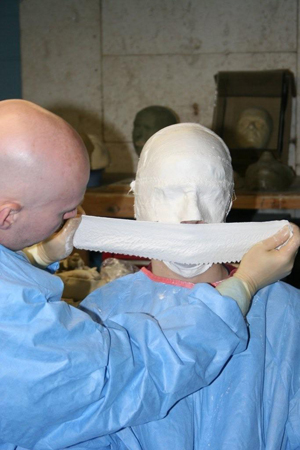 |
Once the first layer of plaster is complete the only uncovered part of the face should be the open nostrils.
| Repeat the entire procedure until three or more layers of plaster have been applied. | 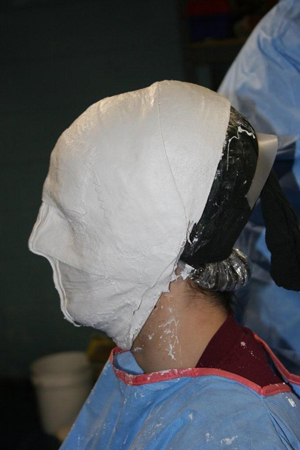 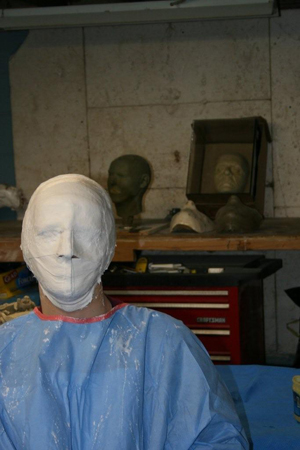 |
Casting the back of the head
Once the plaster is dry, apply a ½ wide coat of Vaseline from ear to ear over the plaster border.Next, dip plaster strips as before and apply to the back of the head horizontally. Overlap the plaster slightly onto the Vaseline that you just applied. Apply the plaster from the top of the head to just below the level of the ears. Stop where the round part of the head ends and the upper neck begins.
Hold the plaster firmly against the back of the head where youve taped it down until it dries and smooth it out as much as possible.
Using the Sharpie, mark several lines connecting the backplate to the head mold. This will be helpful later in reassembling the two parts.
Removing the cast
Once the entire mold is dry to the touch, begin by gently prying the back of the cast off with your fingers. It should loosen fairly easily and pop off. Lay the back plate aside.Next, ask the goalie to begin wiggling his face around inside the mold.
Your friend should gently slide his fingers under the edge of the mold by the jaw line and loosen the edges of the mold all around.
| Next grab the edge of the mold near the ears and pull forward in a steady slow motion. INSTRUCT THE GOALIE TO KEEP HIS EYES CLOSED UNTIL THE MOLD IS OFF AND THE VASELINE IS CLEARED AWAY. | 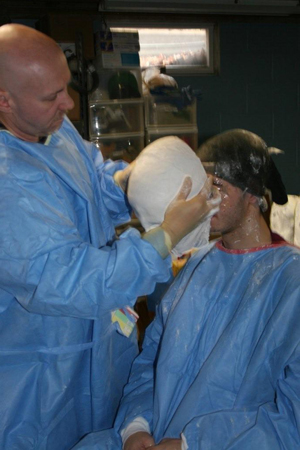 |
It may seem at first that the mold isnt coming off. Once you get some air inside the mold and release the vacuum, the mold should slip off easily.
Place the mold on the side and assist the goalie to wipe out any Vaseline from his eyes before opening them.
Apply plaster strips to cover the nose opening. If you have extra plaster bandage, use it to reinforce the forehead and nose areas. Pack both the head cast and back plate molds using bubble wrap and send it to me.
Mix 2 strong drinks and celebrate ! Youre done !!
Cages
All of the Cubberly cages are meticulously hand made with a high grade stainless steel. Each joint is individually welded to provide maximum stability and strength. The outside perimeter is identical in size for all style cages making them easily interchangeable.Available styles include the popular Double Bar Cats eye cage, the Single Bar Cats eye, the Don Beaupre style cage which provides maximum peripheral vision and the HECC Style cage.
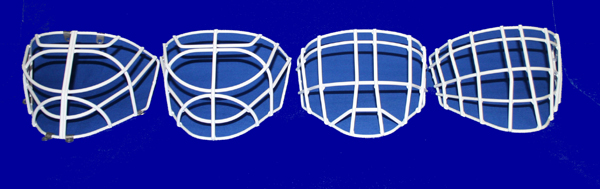
Cages from left to right: Double Bar Cats Eye, Mike Richter, Don Beaupre, HECC Style
Mask Accessories
-Bags
All Cubberly Mask Bags are hand made heavy duty Cordura with a waterproof Lycra lining and internal zippered pouch. The Cubberly half mesh bottom flap allows for maximum ventilation and reducing bacterial growth. Fits all sizes of masks..jpg)

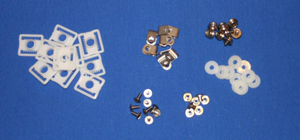
-Hardware
-1 wide plastic buckles are available in traditional white or black -Cage clips are 100% stainless steel and rust proof
-Internal slotted binding posts are 100% stainless steel and allow easy for easy removal
-Dome screws are 100% stainless steel
-Black neoprene rubber or white nylon dome screw buffers are shock absorbing washers that prevents paint from chipping
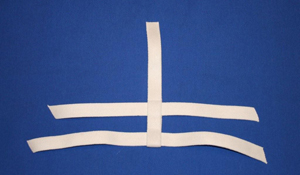
-Harness
The Cubberly Mask Harness is a unique 5 point Extra heavy duty system with 100% memory. These straps stretch slightly then spring back to their original shape and size. They are proven to last over 20 years and still keep their Original memory !! They wont stretch out as many lesser quality straps do. Available in traditional white or black.
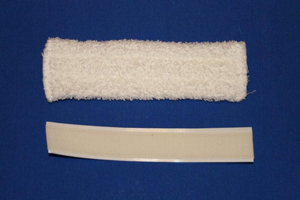
-Sweat Bands
These white sweat bands, made from plush terry cloth material and cut to fit perfectly in your Cubberly mask. The Velcro backed sweat band is easily removable and machine washable.
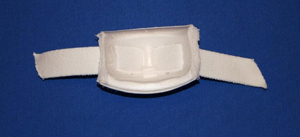
-Chin Cups
These dense white foam chin cups are contoured for maximum comfort and are shock absorbing. Included is a heavy duty suspension strap- the same material used in the Cubberly Harness.
-Foam Padding
Dense Vinyl Nitrile Peel and Stick Rubatex padding is available in 1/8, ¼/ 3/8 and ½ thickness.


